

Table of Contents
- Why Older Homes Need a Different Plumbing Maintenance Approach
- Your Plumbing Inspection Checklist for Homeowners
- Signs of Failing Pipes in an Older Home
- How to Prevent Burst Pipes in Winter
- How Often to Replace Plumbing in an Old House
- Lead Service Lines, Water Quality, and Sewer Laterals in Older Homes
- Building a Long-Term Plumbing Maintenance Calendar
- Prioritizing Repairs and Upgrades for Lasting Performance
- Frequently Asked Questions
Last Updated: October 12, 2026
Why Older Homes Need a Different Plumbing Maintenance Approach
Plumbing maintenance tips for older homes start with one hard truth: the pipes behind your walls were installed for a different era of water demand, building code, and material science.
Older plumbing systems fail in predictable ways. Galvanized steel corrodes from the inside out, copper develops pinhole leaks, and cast iron drain lines crack and root-infiltrate.
That is why maintenance on an older home is not the same as maintenance on a new build. The EPA’s guidance on home water quality and plumbing makes the same point from a health angle: what is inside your pipes affects what comes out of your tap.
Older homes need inspection-driven maintenance, not calendar-driven maintenance. You check specific materials and specific failure points, not just “the plumbing” in general.
Your Plumbing Inspection Checklist for Homeowners
A plumbing inspection checklist for homeowners should be built around two rhythms: a fifteen-minute monthly walkthrough and a deeper seasonal check.
Monthly Walkthrough: Faucets, Fixtures, and Visible Pipes
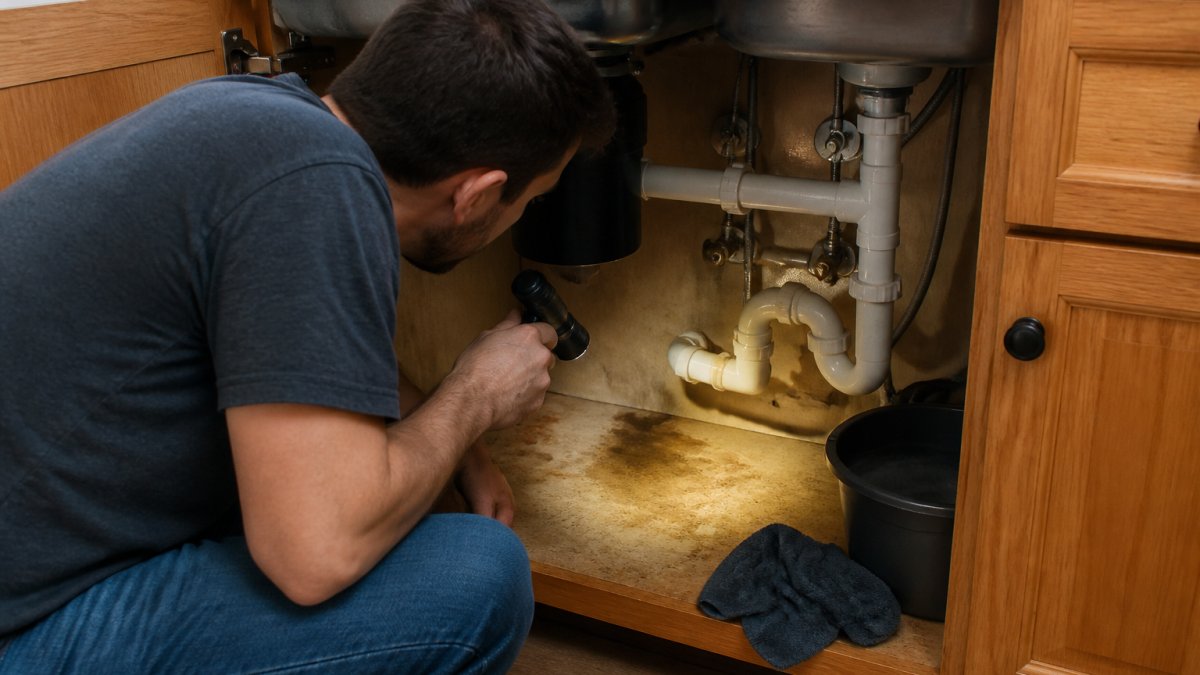
Start under every sink and behind every toilet. Look for moisture, staining, and white mineral crust on fittings. A drip that costs nothing today can rot a cabinet floor within a season.
- Check each faucet for drips at the spout and at the base
- Run your hand along exposed supply lines for dampness
- Look at the cabinet floor under sinks for warping or dark spots
Worn washers and failing cartridges are the most common cause of fixture drips in older homes. Replacing a washer is inexpensive; ignoring the drip until the valve seat corrodes is not.
Seasonal Deep Check: Drains, Water Pressure, and Discolored Water
Twice a year, test how your drains perform: fill a sink and a tub, let them drain fully, and time it. Slow drains point to buildup or a partial blockage.
Check water pressure at an outdoor spigot or laundry sink with a gauge. Low pressure across the whole house usually means a supply-side problem, not a fixture problem. Brown or rust-tinted water on first draw often signals corrosion inside galvanized steel.
If you see rust-colored water only from the hot side, the problem is usually the water heater, not the pipes. If it appears on both hot and cold, suspect the supply lines themselves. Getting this wrong leads to replacing the wrong thing.
Signs of Failing Pipes in an Older Home
Signs of failing pipes in an older home rarely appear as a single dramatic event. They stack up quietly: a metallic taste in the water, a creeping water bill, a musty smell in the basement, or a ceiling stain that reappears after you paint over it.
Watch for these red flags:
- Pinhole leaks on copper lines, often visible as green or white crust
- Rust-colored water on the cold side
- Water pressure that drops when two fixtures run at once
Any one of these deserves a professional look; two or more together usually means the system is near the end of its service life, the difference between a targeted repair and a full repipe.
How to Prevent Burst Pipes in Winter
Burst pipes in winter are almost always a freezing problem, not a pressure problem. Water expands as it freezes, splitting the pipe, and the leak often appears somewhere other than the freeze point.
Prevention comes down to three things:
- Insulate exposed pipes in crawl spaces, garages, basements, and along exterior walls.
- Seal drafts around pipe penetrations, foundation vents, and rim joists so cold air stops reaching the pipes.
- Keep indoor temperature steady, even when you travel. A minimum setting of 55°F prevents most freezing in a heated home.
On nights forecast below freezing, open cabinet doors under sinks on exterior walls and let a pencil-thin trickle run from the fixture farthest from the main. If you leave for a winter trip, shut off the main and drain the lines.
The pipe most likely to freeze in an older home is the one feeding an exterior hose bib. Install a frost-free sillcock or add an interior shutoff and drain valve. It is one of the cheapest upgrades you can make.
How Often to Replace Plumbing in an Old House
How often to replace plumbing in an old house depends entirely on the material, any guide that gives you one number is guessing. The useful question is: what is this pipe made of, how much life does it have left, and what does it cost to fix versus replace?
Identify the Material First
Most older homes contain a mix of materials installed in different decades, so check each accessible run separately.
- Galvanized steel, dull gray, magnetic (a refrigerator magnet sticks), often with threaded joints and a chalky white or rust-colored crust. Used heavily before the 1960s. Corrodes from the inside out, so the outside can look fine while the interior is nearly closed off.
- Lead, dull gray, soft enough to scratch with a key, does not sound hollow when tapped, and shows a dull thud rather than a ring. Common in service lines and some interior supply lines in pre-1950s homes.
- Copper, reddish-brown, non-magnetic, usually soldered at joints. Common from the 1950s through the 1990s. Can develop pinhole leaks, especially with aggressive or high-pH water.
A licensed plumber can confirm material at accessible points. Do not cut, scrape, or disturb any pipe you suspect is lead, leave that to a professional.
Lifespan and Failure Modes
| Pipe Material | Typical Service Life | Common Failure Mode |
|---|---|---|
| Galvanized steel | 40-50 years | Internal corrosion, pressure loss |
| Lead | Not rated for potable use | Leaching, health risk |
| Copper | 50-70 years | Pinhole leaks, aggressive water |
| PEX | 40+ years | Fitting failures, UV exposure |
| Polybutylene | 10-15 years | Sudden fitting failure |
| Cast iron drain | 50-75 years | Cracking, root intrusion |
| Clay sewer lateral | 50-60 years | Cracks, root infiltration |
| PVC drain | 50+ years | Joint separation, crush damage |
A 1955 home with original galvanized supply lines is well past its replacement window; a 1985 home with copper may have decades left. Material matters more than build date.
Repair, Partial Repipe, or Whole-Home Replacement
Once you know the material and condition, you are choosing between three paths:
- Targeted repair, best when the problem is isolated (one pinhole leak, one failed fitting) and the rest of the system tests sound. Lowest upfront cost, but on a system already past its service life, you may be paying for the same failure again within a year.
- Partial repipe, replacing one branch or one material type (for example, all galvanized supply lines) while leaving sound copper or drain lines in place. A common middle path in older homes with mixed materials.
- Whole-home repipe, warranted when multiple materials are failing, pressure loss is system-wide, or a lead service line must be replaced. Highest upfront cost, but it resets the clock on the supply side.
When two or more failures occur on the same material within a year, the system is near the end of its service life, and a partial or whole-home repipe is usually more economical than repeated repairs. Ask any plumber to quote repair, partial repipe, and full repipe side by side so you can compare total cost of ownership, not just the first invoice.
Get the material identified in writing before you authorize any repipe. A quote that does not name the pipe material and the scope of what is being replaced is not a quote you can compare against another.
Lead Service Lines, Water Quality, and Sewer Laterals in Older Homes
Lead service lines are the single most important water quality concern in pre-1986 homes. The EPA’s Lead Service Line Replacement information explains that lead pipes were commonly used for the line running from the water main to the home. If your home predates the mid-1980s, that line may still be lead. This section walks through how to check, test, and act, and then covers the other buried pipe most older-home owners forget: the sewer lateral.
Step 1: Find Out What Your Service Line Is Made Of
You can often identify the material yourself where the line enters the home, usually in the basement, crawl space, or at the water meter.
- Lead, dull gray, soft enough to scratch with a key, does not sound hollow when tapped, and shows a dull thud rather than a ring.
- Copper, reddish-brown, non-magnetic, usually soldered at joints.
- Galvanized steel, gray but magnetic; a refrigerator magnet sticks.
If the line is not visible inside, check with your water utility. Many maintain service-line material records and will confirm the material on their side of the meter, and some offer a free or low-cost inspection.
Step 2: Test Your Water
If the service line is lead, or you are unsure, test the water. Two options:
- Certified laboratory testing, the most reliable. Look for a lab certified by your state’s drinking-water program. A lead test typically requires a first-draw sample collected after the water has sat in the pipes for several hours.
- Utility and public-health programs, many water systems offer free or reduced-cost lead testing, especially in older service areas. Your local health department can also point you to testing resources.
Lead commonly shows up in first-draw samples and drops after flushing, so collect the sample before running any water in the morning.
Step 3: Reduce Exposure While You Plan Replacement
If lead is present, these steps reduce exposure in the meantime:
- Run the cold tap for a short period before drinking or cooking, especially after the water has been sitting overnight.
- Use cold water for drinking, cooking, and mixing formula. Hot water dissolves lead more readily.
- Clean faucet aerators periodically; sediment can trap lead particles.
Lead service-line replacement is typically a shared responsibility between the homeowner and the water utility, and programs vary widely. Contact your utility about replacement programs, cost-sharing, and timelines before you hire anyone.
Sewer Laterals: The Buried Pipe Homeowners Own
The lateral is the pipe running from your home to the municipal sewer or septic system, and it is the homeowner’s responsibility, not the utility’s.
Warning signs of a failing lateral:
- Repeated backups at the lowest drain in the home, often a basement floor drain
- Slow drainage throughout the house, not just one fixture
- Gurgling sounds from drains when appliances discharge
A camera inspection is the only reliable way to confirm lateral condition. A plumber feeds a small camera through the cleanout and records the interior of the line, identifying cracks, offsets, root masses, and bellies where waste collects.
If the lateral is damaged, options range from spot repair to full replacement, depending on location and extent.
Never ignore a recurring drain backup in a basement floor drain. It usually points to a lateral problem, not an internal clog. Repeated snaking without a camera inspection keeps you paying for the same failure.
The two buried pipes in an older home, the lead service line and the sewer lateral, are the ones most homeowners never think about until they fail. Check the service-line material, test the water if lead is possible, and camera-inspect the lateral on a schedule. Those three steps cover the risks that interior maintenance checklists miss.
Building a Long-Term Plumbing Maintenance Calendar
A maintenance calendar turns reactive repairs into planned work. Here is a practical schedule:
| Frequency | Task |
|---|---|
| Monthly | Inspect under sinks and toilets; test shutoff valves |
| Quarterly | Check water pressure; watch for discolored water |
| Twice yearly | Deep-clean drains; inspect exposed pipes for corrosion |
| Annually | Flush the water heater; test for leaks after temperature swings |
| Every 2-3 years | Camera-inspect sewer lateral in pre-1980 homes |
| Every 5 years | Professional whole-system assessment |
The value of the calendar is the record. When you track pressure readings, drain times, and discoloration, you build a baseline, and deviations are your earliest warning that something is changing.
Prioritizing Repairs and Upgrades for Lasting Performance
Prioritization is where most homeowners get stuck. The instinct is to fix whatever is loudest or most visible.
Fix first: active leaks, failing shutoff valves, and any lead service line. These carry water damage or health risk.
For homeowners on a tight budget, project financing and phased scheduling make this manageable.
The takeaway for any older home is straightforward: identify your pipe materials, inspect on a schedule, and address the highest-consequence items first.
Frequently Asked Questions
What are the most important plumbing maintenance tasks for an older home?
Prioritize checking exposed pipes for rust, corrosion, or leaks, testing water pressure, and inspecting under sinks and around toilets for moisture. Flush drains regularly to prevent clogs, insulate pipes before winter, and watch for discolored water that may signal pipe corrosion. A yearly professional inspection can catch problems early and help you avoid water damage. These plumbing maintenance steps are especially important in homes with aging pipes.
How often should older home plumbing be inspected?
Plan a professional plumbing inspection every 12 to 18 months. If your home has galvanized steel or lead pipes, or if you notice recurring leaks or low water pressure, schedule one sooner. Between professional visits, do your own monthly walkthrough using a homeowner checklist. Regular inspections help identify failing pipes before they cause major water damage or require emergency repairs.
How can I tell if old pipes need to be replaced?
Warning signs include rust-colored water, frequent leaks, low water pressure throughout the house, and visible corrosion on exposed pipes. If your home still has galvanized steel or lead lines, replacement is often the best long-term solution. A licensed plumber can perform a camera inspection and pressure testing to confirm the condition of your pipes and recommend whether repair or replacement makes more sense.
What should I do to prevent pipes from bursting in winter?
Insulate exposed pipes in basements, crawl spaces, and attics. Seal drafts around windows, doors, and where pipes enter the home. Keep your indoor temperature at 55°F or higher, even when away. On extremely cold nights, let faucets drip slightly to relieve pressure. If you plan to travel, shut off the main water valve and drain the system. These steps greatly reduce the risk of frozen and burst pipes.
How do I know if I have lead service lines?
Lead service lines are typically dull gray and soft enough that you can scratch them with a key, revealing a shiny silver color. They may also be magnetic. Check the pipe where it enters your home, often in the basement or crawl space. If you suspect lead, contact a licensed plumber for testing. You may also ask your water utility for records. If lead is present, consider replacement or use a certified water filter.
When should I call a plumber about a leak or low water pressure?
Call a plumber if you see active dripping, water stains on ceilings or walls, or a sudden drop in water pressure. Persistent low pressure can indicate a hidden leak, corroded pipes, or a failing pressure regulator. If your water heater is over 10 years old and pressure issues are widespread, a professional evaluation can determine whether repair or replacement is needed. Early attention prevents water damage and higher repair bills.
