

Table of Contents
- How to Tell If Pipes Are Frozen
- What to Do Before Thawing: Preparation Steps
- How to Locate the Frozen Section
- Safe Ways to Thaw Frozen Pipes
- How Long It Takes to Thaw Frozen Pipes
- What to Do If a Frozen Pipe Bursts
- Post-Thaw Inspection and Damage Checks
- Frequently Asked Questions
Last Updated: October 20, 2026
How to Tell If Pipes Are Frozen
A frozen pipe stops water flow completely or reduces it to a trickle. The telltale sign is no water from a faucet even though the supply is on.
Check these common problem areas first:
- Pipes along exterior walls
- Pipes in unheated crawl spaces or basements
- Pipes near windows or doors
If one faucet is dry but others flow, the frozen section is likely between that faucet and the main line. If nothing flows anywhere, the blockage is probably at the main supply or a shared line.
Touch exposed pipes with your hand. A frozen pipe feels ice-cold to the touch, while a normal pipe at room temperature feels cool but not frozen solid. This quick test saves time.
What to Do Before Thawing: Preparation Steps
Before applying any heat, take these steps. Rushing into thawing can cause burst pipes or water damage.
Turn Off the Main Water Supply
Locate your main shutoff valve, usually in the basement, crawl space, or where the water line enters your home. Turn the handle clockwise until it stops. This is essential if you suspect a burst pipe.
If a pipe has already cracked, thawing it with pressure still on will spray water everywhere. Shutting off the supply first prevents that damage.
Open Faucets to Relieve Pressure
Once the main supply is off, open all faucets and leave them open during thawing so trapped water and steam can escape as the ice melts.
Open faucets on all levels, including outdoor spigots if accessible, and don’t close them until water flows normally again.
How to Locate the Frozen Section
Start at the faucet where water stopped and feel the pipe with your bare hand toward the main line.
If the pipe is hidden, check all accessible pipes in the area for discoloration, frost, or bulging that suggests ice inside.
For pipes inside walls, listen for ice crackling or water pushing through the blockage.
If you can’t find the frozen section after checking all accessible pipes, the blockage is likely concealed.
Never apply heat to a pipe you cannot see or reach safely. Hidden pipes in walls or attics can overheat and cause fires. If the frozen section is not accessible, professional help is your safest option.
Safe Ways to Thaw Frozen Pipes
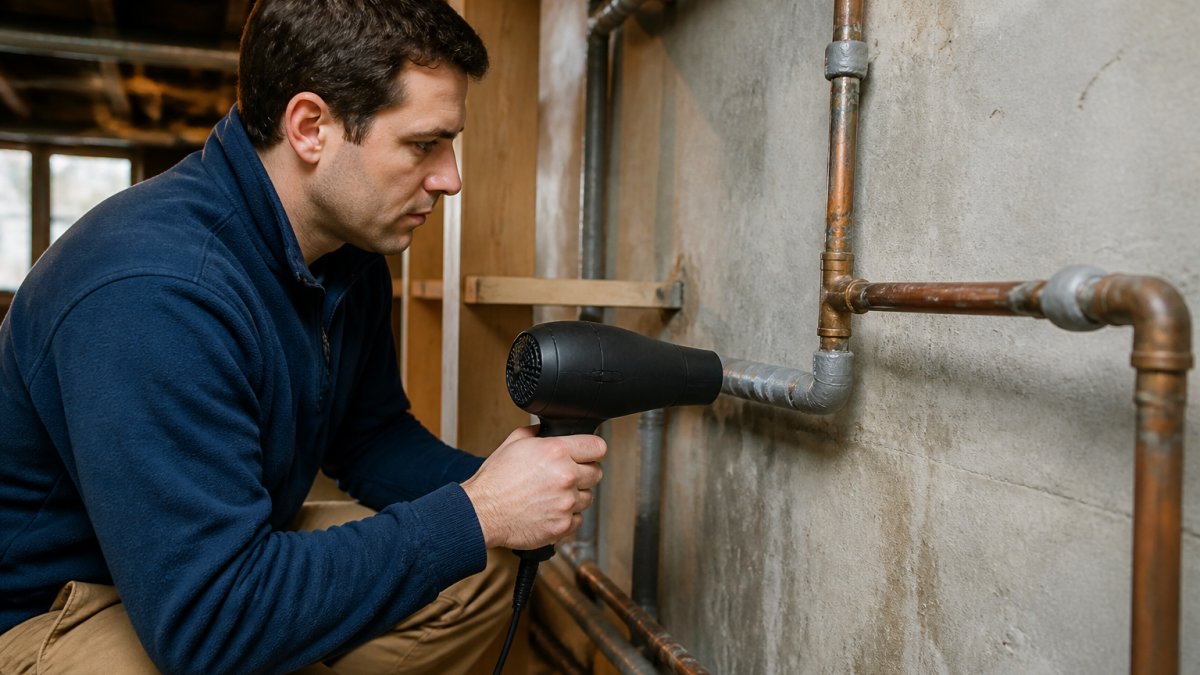
Apply heat gradually, working from the faucet end toward the blockage. Match the method to the pipe material and whether it is exposed or concealed, the wrong heat source can soften PEX, crack copper at a joint, or start a fire inside a wall cavity.
Match the Heat Source to the Pipe Material
Plumbing materials tolerate heat very differently. Before picking a tool, identify the pipe material, usually stamped on the pipe or visible at a fitting.
- Copper: Handles gradual heat well and conducts it along the run, so a hair dryer or heat tape works efficiently. Avoid concentrating heat on a single soldered joint; solder can soften and fail before the copper does.
- PEX and CPVC: These are plastic and soften at lower temperatures than copper. Keep heat sources moving, never rest a heat gun against the pipe, and prefer warm towels, a hair dryer on low, or heat tape rated for plastic pipe. A heat gun held too close can deform PEX permanently.
- Galvanized steel and iron: Slow to heat and slow to thaw. Warm towels and space heat are safer than a concentrated heat gun, which can stress old fittings.
Accessible Pipes: Fast, Direct Methods
For pipes you can see and reach, under sinks, along basement ceilings, in crawl spaces, direct heat is appropriate.
Hair dryer. The default safe choice.
Heat gun. Faster but less forgiving.
Warm towels and hot-water bottles. Soak towels in hot (not boiling) water, wring them out, and wrap the frozen section, refreshing every 5-10 minutes.
Heat tape (electric heating cable). Wrap it around the pipe per the manufacturer’s instructions and plug it in.
Space heater. Useful for warming air around an exposed pipe in a crawl space or basement. Keep it at least 3 feet from the pipe and any flammable material, never place it against the pipe, and never run a fuel-burning heater in an enclosed space (Keep Warm and Safe This Winter: Tips for Using Generators, Furnaces and Space Heaters).
Concealed Pipes: What Changes Inside Walls, Ceilings, and Crawl Spaces
When the frozen section is behind drywall, above a ceiling, or in a sealed chase, you can’t see the pipe or confirm how hot it’s getting. That changes the rules.
- Raise the room temperature first. Open cabinet doors under sinks, turn up the thermostat, and let warm room air do the work before you introduce a direct heat source.
- Use indirect heat only. A space heater aimed at the wall or a hair dryer played across the surface is safer than anything pressed against drywall. Never cut into a wall to reach a pipe unless you are qualified to repair it afterward.
- Stop if you cannot confirm progress. If room warming and indirect heat produce no water flow within a few hours, the blockage may be deeper in the system than you can safely reach. That is the point to call a licensed plumber rather than escalate to a torch or a heat gun inside a cavity.
Never use an open flame, blowtorch, candle, or propane torch on any pipe, and never use any of them inside a wall, ceiling, or crawl space. Open flames ignite framing and insulation, and they can boil trapped water into steam that splits the pipe. Fuel-burning heaters in enclosed spaces also risk carbon monoxide buildup.
Quick Selection Guide
- Exposed copper, lightly frozen: hair dryer or heat tape.
- Exposed PEX or CPVC: warm towels or hair dryer on low; heat tape rated for plastic.
- Old or unknown pipe: warm towels first.
- Inside a wall or ceiling: raise room temperature and use indirect heat; call a plumber if nothing moves.
Whichever method you use, watch the open faucet: a trickle means the blockage is breaking up. Keep heating until full pressure returns, then hold heat another 10-15 minutes so the line does not refreeze.
How Long It Takes to Thaw Frozen Pipes
Thawing time depends on how badly the pipe is frozen, its location, and your method.
A hair dryer on a lightly frozen pipe might restore flow in 30 minutes; a deeply frozen pipe in a crawl space could take 2-3 hours, and heat tape left overnight can thaw stubborn blockages by morning.
Most homeowners see water return within 1-2 hours. Once it flows, keep applying heat another 10-15 minutes to clear the entire blockage.
Don’t stop too early, a partially thawed pipe can refreeze, especially in very cold weather.
What to Do If a Frozen Pipe Bursts
A burst pipe is an emergency, but not every loss of pressure means a burst. First tell a frozen blockage apart from an active leak, the two call for different actions.
First: Decide Whether You Have a Burst or a Freeze
- Is water flowing anywhere? If one faucet is dead but others run, you likely have a frozen section, not a burst. If no faucet runs and you hear water running inside a wall or ceiling, suspect a burst.
- Do you see water where it should not be? Staining, bulging drywall, dripping from a ceiling, or water pooling near a wall are signs of an active leak. A frozen pipe is silent and dry until it thaws.
- Did pressure drop suddenly? A sudden loss of pressure across the whole house, paired with the sound of running water, points to a burst. A gradual slowdown points to a freeze.
- Is the water discolored or aerated? Rusty or sputtering water at a working faucet can indicate air entering the system through a crack.
If the evidence points to a burst, treat it as an emergency and move to the shutdown steps. If it points to a freeze, go back to the thawing guidance above and keep watching for leaks as the ice melts, a pipe that froze can crack and only reveal the leak once water starts moving again.
Shut Off the Water and Limit the Damage
- Turn off the main water supply. Close the main shutoff valve clockwise until it stops. If you cannot find it, a curb-stop shutoff at the property line may be operated by your water utility, call them if you cannot locate a working valve.
- Open all faucets. This drains remaining water from the system and relieves pressure on the damaged section.
- Cut power to wet areas. If water is near outlets, a panel, or appliances, switch off the breaker for that area at the panel, but only if you can reach the panel without standing in water. Never touch a wet electrical panel.
- Document the damage. Photograph and video the leak and affected rooms before cleanup for your insurance claim.
- Call a licensed plumber. A burst section needs to be cut out and replaced; temporary wraps rarely hold.
While you wait, place buckets under the leak, move furniture and valuables clear, and use towels or a wet/dry vacuum to keep water from spreading under flooring. Do not run a shop vacuum or any corded appliance in standing water.
When to Escalate Beyond a Plumber
Some burst-pipe situations are beyond a repair call.
- Water is contacting electrical equipment, a panel, or a gas appliance. Leave the area and call the utility or emergency services.
- Water is rising faster than you can contain it, or a ceiling is sagging. Evacuate the room and call for emergency help.
- Sewage is backing up with the water. Treat it as a health hazard and keep people out of the area.
- You smell gas. Leave the building and call the gas utility from outside.
A burst pipe can cause thousands of dollars in water damage within hours, and the damage continues until the supply is shut off. Shut the water off first, then call for help, do not wait to see whether thawing resolves it.
After the Plumber Leaves
Once the repair is done, run water at every fixture and check under sinks, in basements, and around the repaired section for new drips. Watch for delayed signs, bubbling paint, soft drywall, musty odors, over the next several days, since water travels along framing before it shows. Keep the repair receipt and photos with your insurance documentation, and insulate or heat-tape the repaired section before the next cold snap so the same spot does not freeze again.
Post-Thaw Inspection and Damage Checks
Once water flows normally, inspect the pipe for damage before considering the problem solved.
Look for:
- Cracks or splits in the pipe
- Pinhole leaks that spray water
- Bulging or warping
- Discoloration or corrosion
Run water from every faucet and check under sinks and in basements for new leaks.
Check your water bill over the next few weeks.
For pipes that thawed without damage, monitor them closely during the next cold snap.
Frozen pipes are a winter headache, but the right approach thaws them safely and prevents burst pipes.
Frequently Asked Questions
How can I tell if my pipes are frozen?
Look for reduced or no water flow from faucets, white frost or ice buildup on exposed pipes, or unusual odors from drains. Frozen pipes typically occur in unheated areas like crawl spaces, exterior walls, or attics. If you notice these signs, check the affected section immediately and avoid using that fixture to prevent pressure buildup.
What is the safest way to thaw a frozen pipe?
Start near the faucet and work toward the blockage using gentle, gradual heat. A hair dryer on low setting, warm towels, or a heating pad are safest. Avoid open flames, blowtorches, or high-heat sources that risk fire or pipe damage. Always open faucets first to relieve pressure and monitor the process closely for safety.
How long does it take to thaw a frozen pipe?
Thawing typically takes 30 minutes to several hours, depending on the blockage size, pipe material, and heat method used. Gentle methods take longer but are safer. If water flow doesn’t return after 2-3 hours of steady heat application, the blockage may be severe or the pipe may have burst, contact a licensed plumber for professional assessment.
What should I do if a frozen pipe has burst?
Immediately shut off the main water supply to stop water flow and prevent damage. Open faucets to drain remaining water. Do not attempt to thaw a burst pipe yourself, call a licensed plumber right away. Check for leaks, standing water, and electrical hazards. Document water damage with photos for insurance purposes if needed.
